


Testing a new pizza dough

This is pizza Mary Anne

The dough wasn't great

My rustic red sauce, "Perfecto"!

Fresh ingredients

My pizza dough is getting better

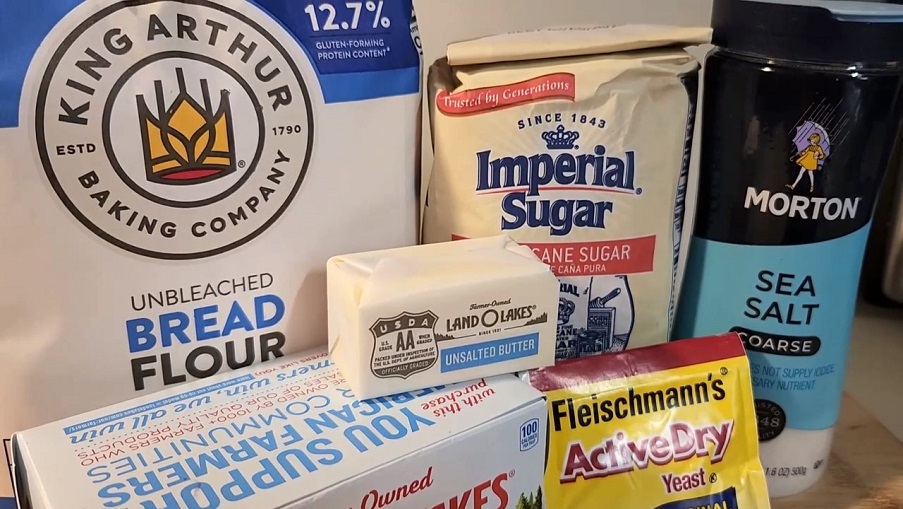
The ingredients I used are no longer a secret.

Makings a tomato roux.

Allowed to simmer for 45 minutes to 1 hour.

My rustic red tomato sauce, "To die for!"

Trust the process

This was darn good!

A brioche dough minus the eggs and honey.
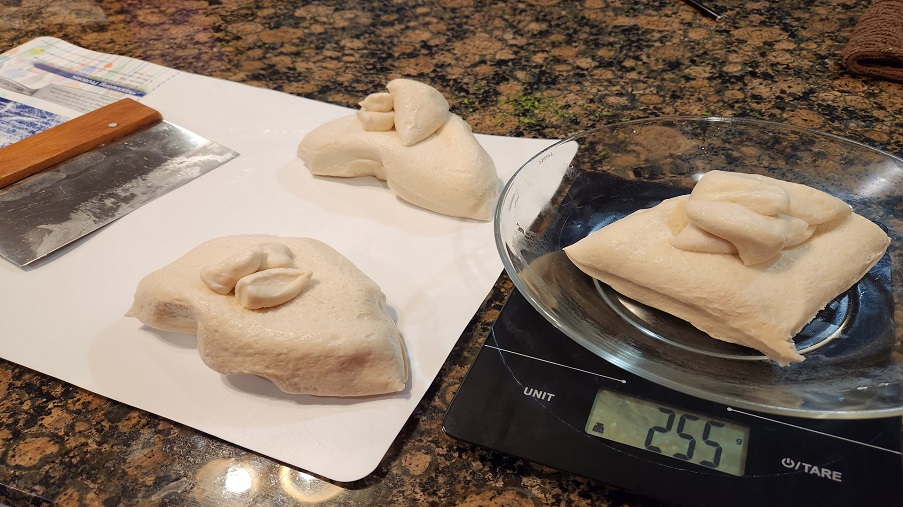
Prefermented dough with "Poolish" & "Tangzhong".

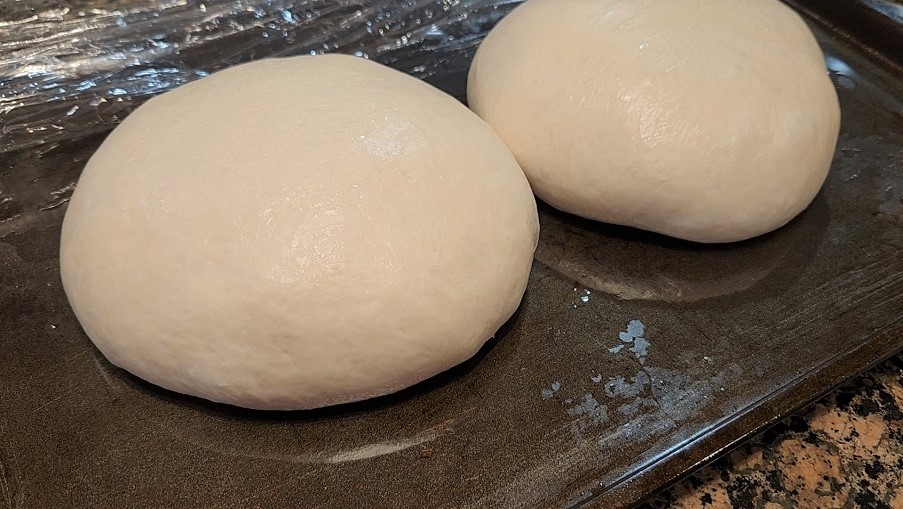
Form, cover, and proof the dough for 1 to 2 hours.
The dough is ready when it doubles in volume.
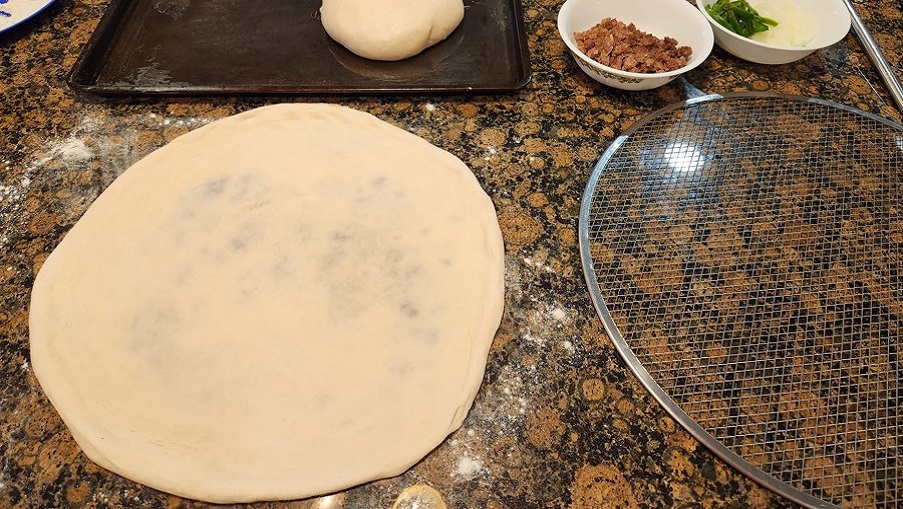
Place dough on flat surface and sprinkle with flour.
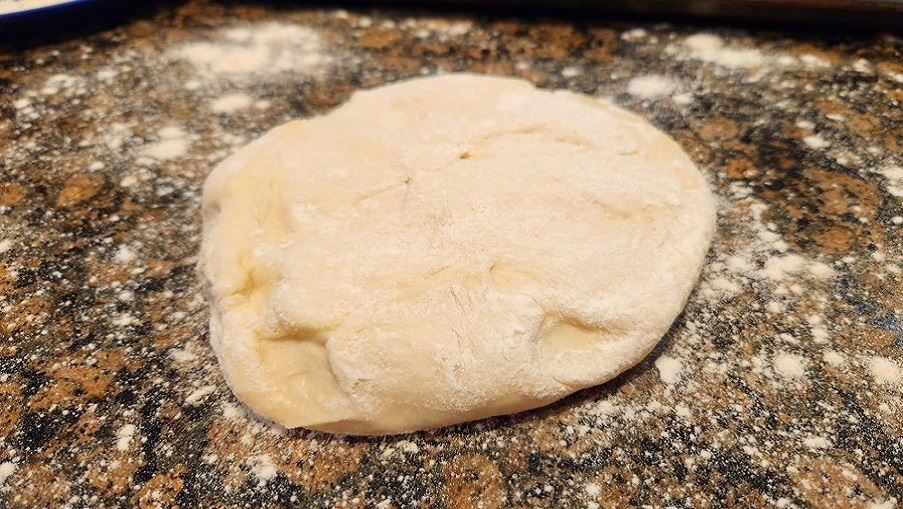
Stretch the dough into a 14" to 15" in diameter.
My "Rustic Red Sauce" is my secret ingredient.

Add sauce and other toppings to make the pizza.

Bake pizza at 525 degree F for 8 to 12 minutes.

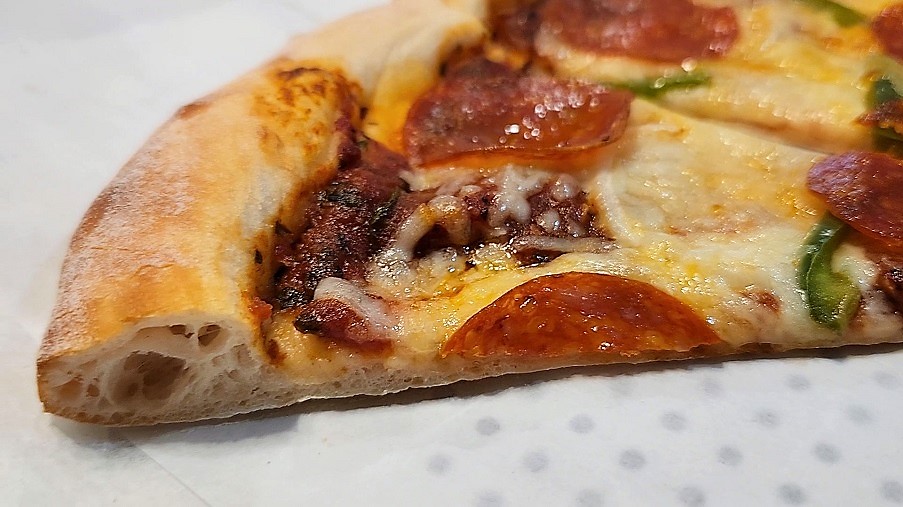
Now that is a good looking pizza!

I couldn't wait. I had to have a slice of pizza.
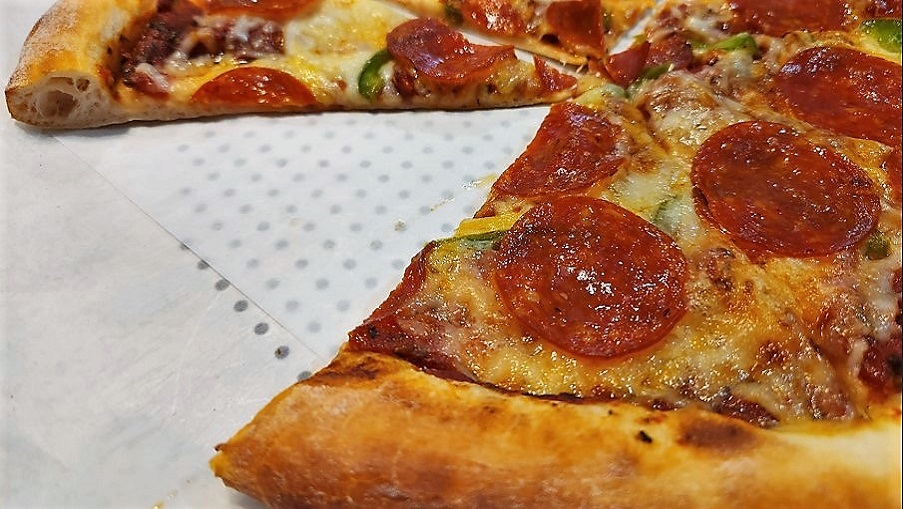
An ultra thin and chewy pizza. Just the way I like it!
A Poolish

A Tangzhong (A.K.A. Yudane)

A Yeast Bloom

Poolish, Tangzhong, and the Yeast Bloom

Combining Ingredients

The Final Dough

The Crumb (Inner structure)
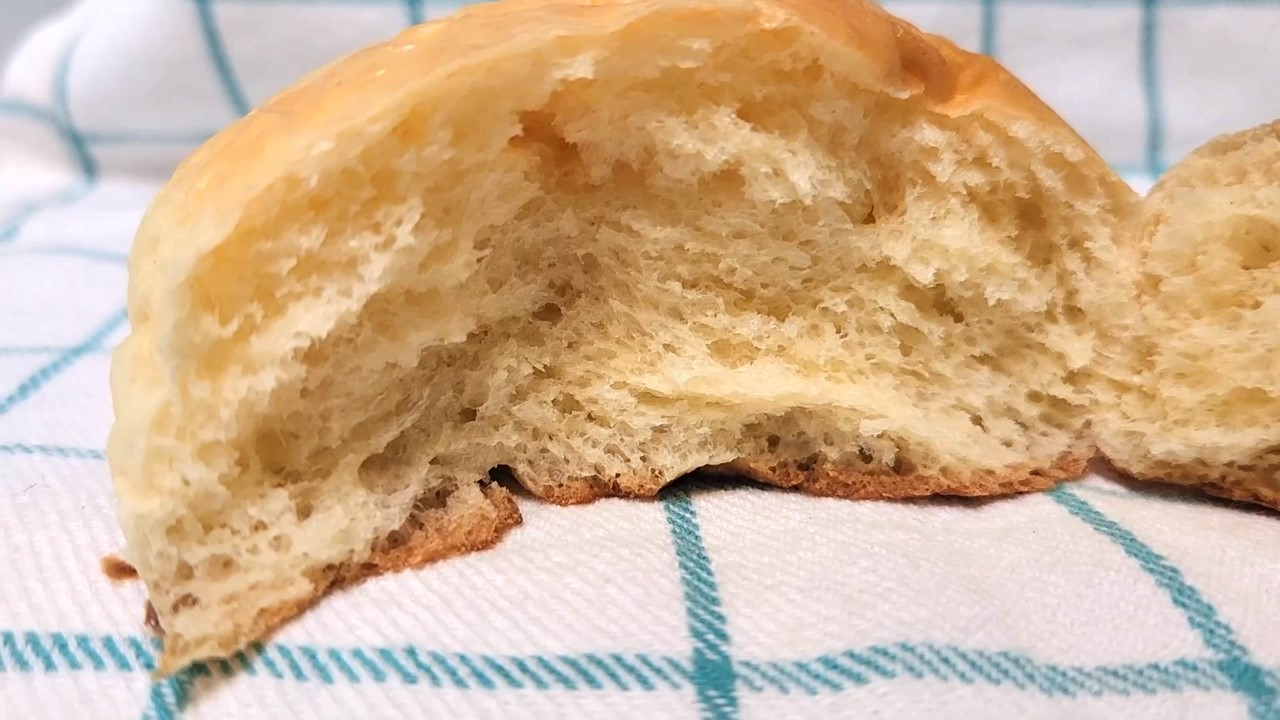
The Crust (The outter shell)

The Oven Spring (Gas expansion)

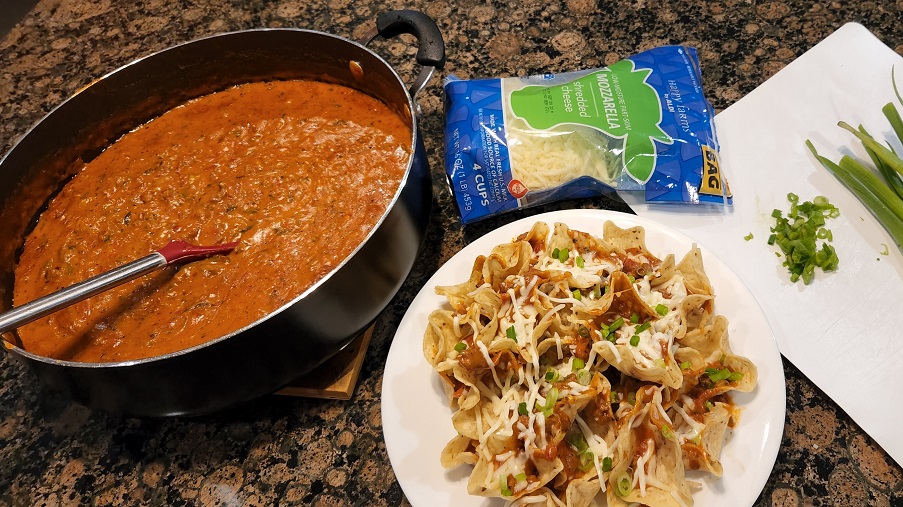
Chicken-spinach lasagna

Looking good
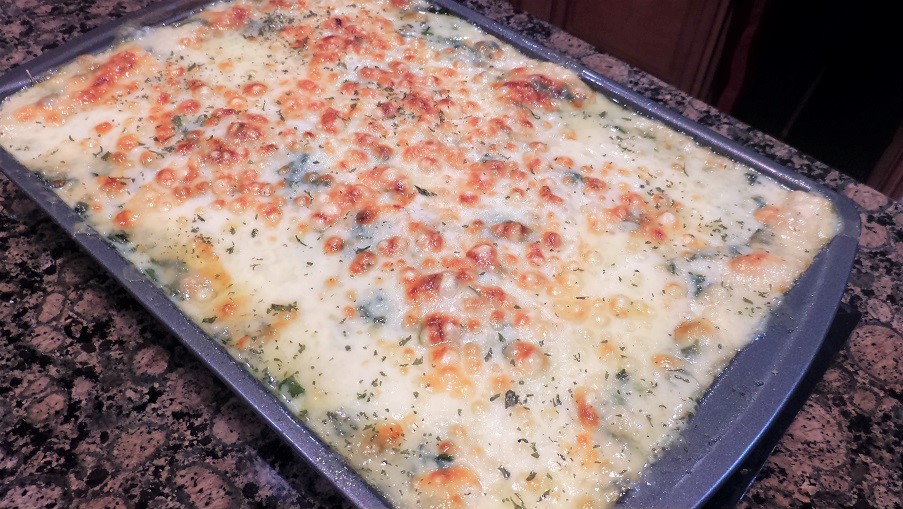
It turned out great!

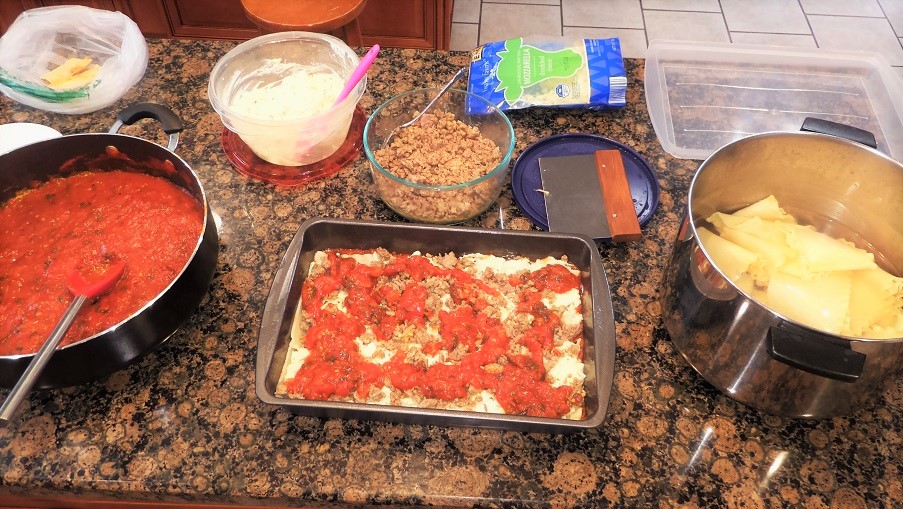
My rustic lasagna
Mouth watering good

Both savory and delicious

Got to start somewhere

Putting together the components

Ready to eat the sandwich

BBQ chicken today

Ribs, chicken and smoked sausages

Mmm-mmm good!

BBQ chicken again

BBQ ribs and smoked sausages

Ready to eat

BBQ ribs, and burnt ends

BBQ chicken, ribs, and smoked sausages

BBQ ribs, and smoked sausages

The key is the zip-top bag!

Fish Strips Anyone!

A Southern Fried Fish Sandwich.

Fish, Shrimp, and Parmesan Fries!

Adding the Fish One Filet at a Time.

Less Talking, more Eating!

Simple ingredients

In a stand mixer, mix the Brioche dough.

Brushed with an egg wash and placed in oven.

Bake at 350 F for 12 to 15 minutes.

Brushed with honey butter and allowed to cool!

Soft, airy, and full of goodness.

Let's get started!

I finally got a burger press!

Scrumpdillyicious!

Grilling the Hamburger Buns

Smash Burgers Again

This Time a Double Cheese Burger

The makings of a burger sandwich

Open face or regular sandwich?

Sandwich style it is!

I finally got to cook on a Phillips XL indoor grill.
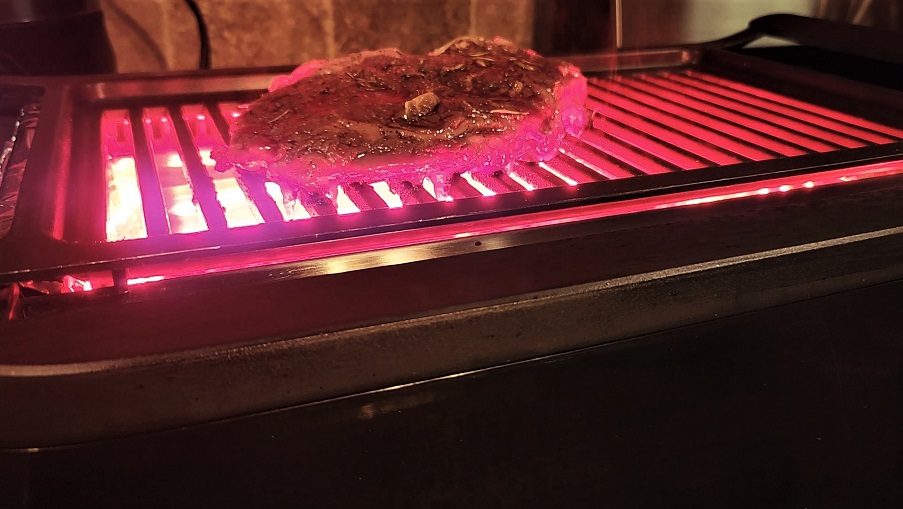
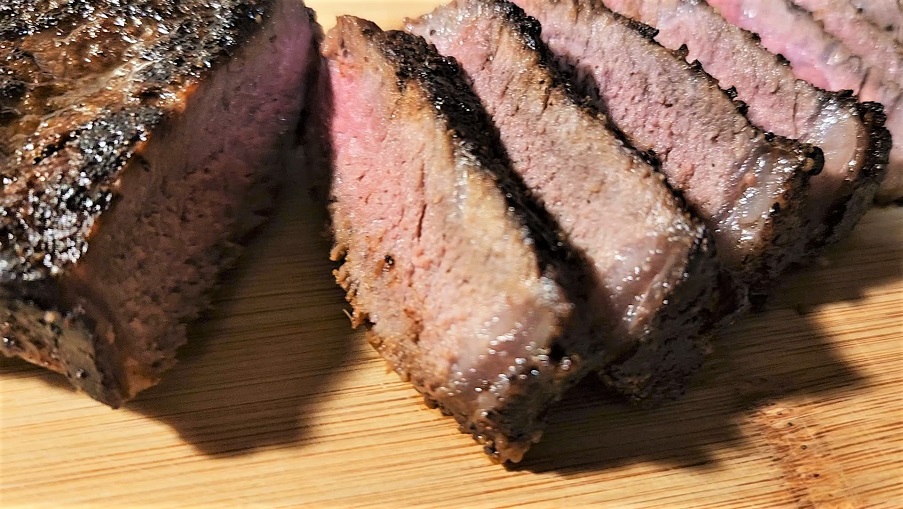
Now I have to master time and temperature.

Unfortunately, I over cooked the steak.
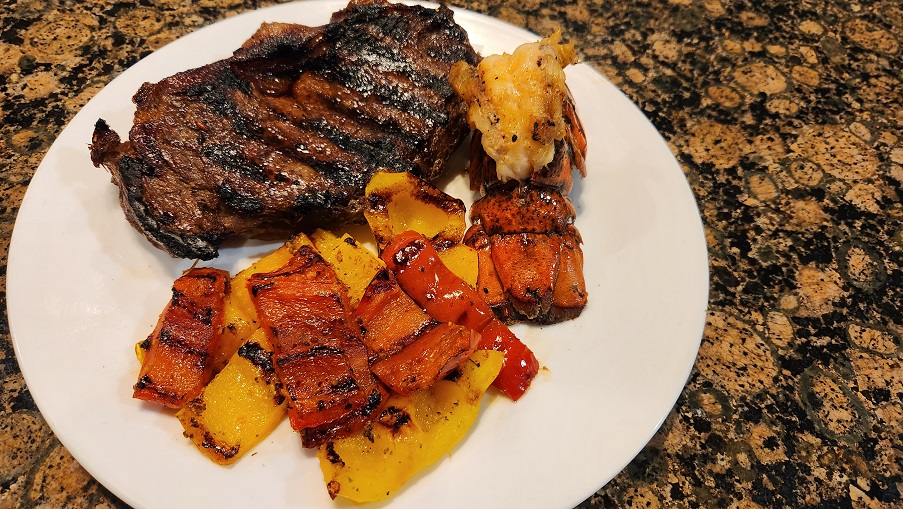
Starting with a room temperature steak.
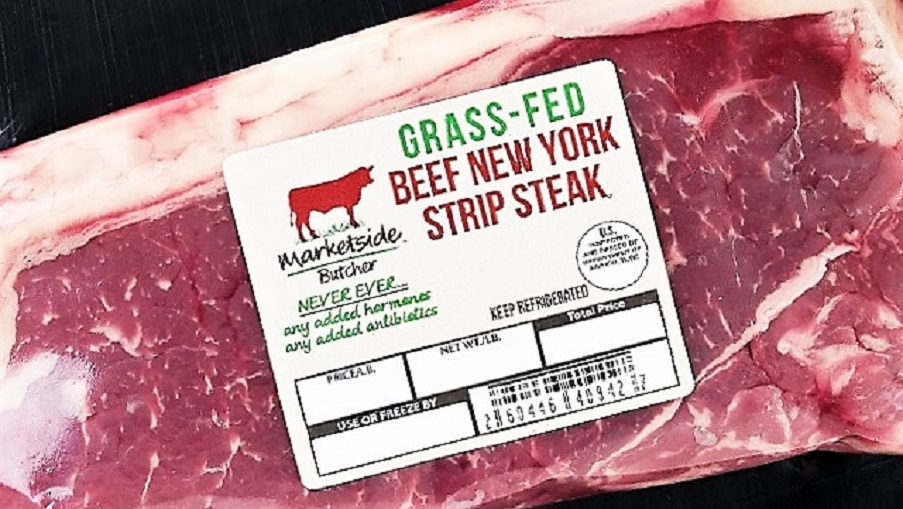
Seasoned with salt, black pepper and galic powder.
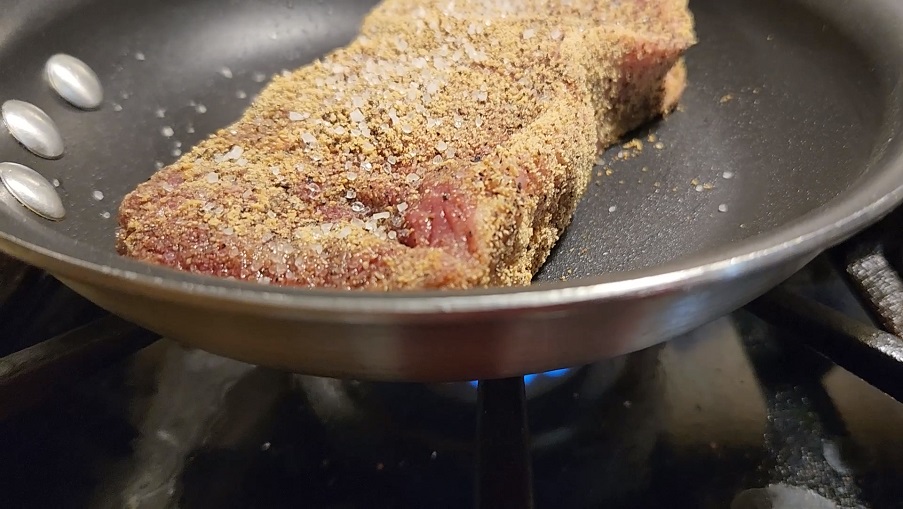
Cooked to a medium-well.
1st Sear & Rest.

1st Sear & Rest.

Time to Eat!

Simple Ingredients

Layering the topings
Missing a beer or a Grande Margarita

Gouda, Mozzerella, Parmesan, Green Onions & Ham

Crispy outside and gooey inside

Cheesy and delicious

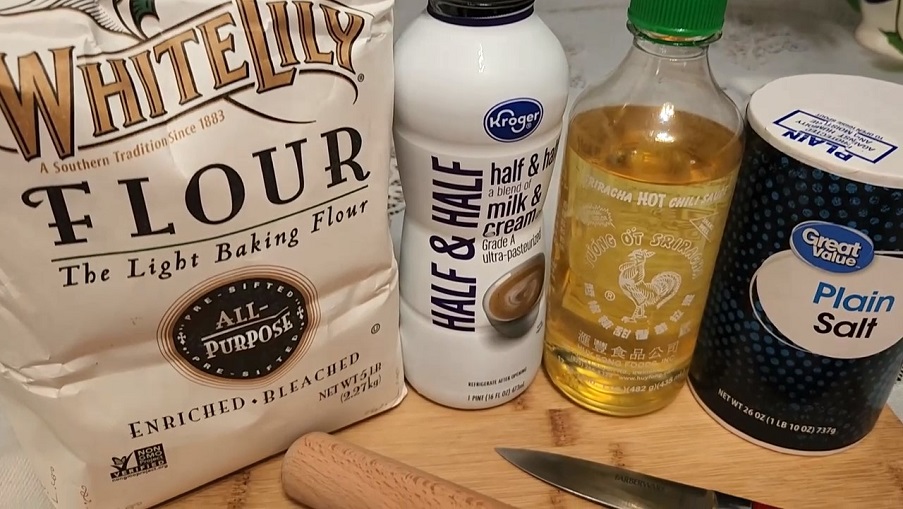
AP Flour, Half & Half, Scallion Oil, and plain salt were used
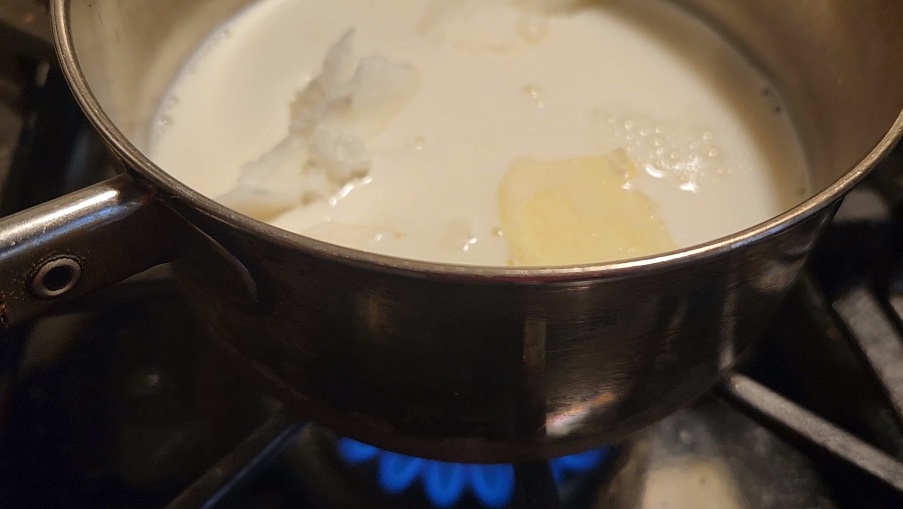
Scalded milk & cream, butter, and scallion oil were heated
Kneaded by with a stand mixer for five minutes

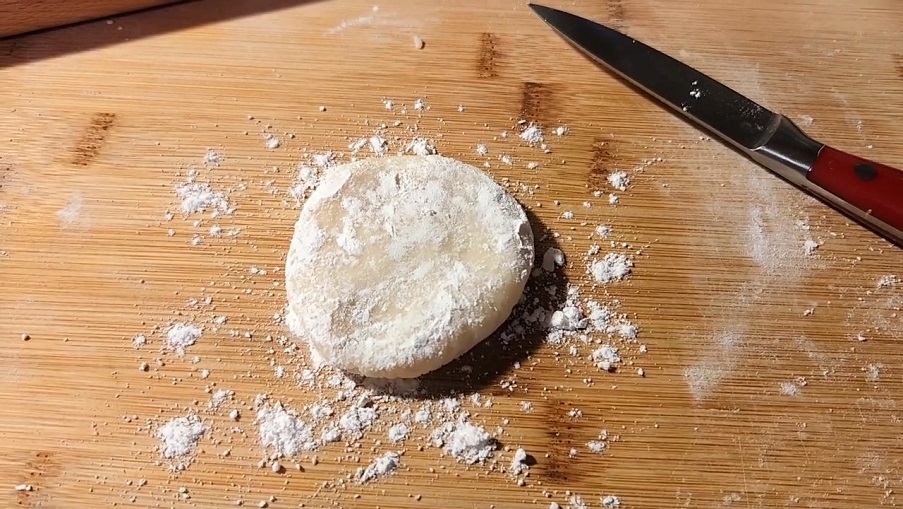
Weighing the tortillo dough

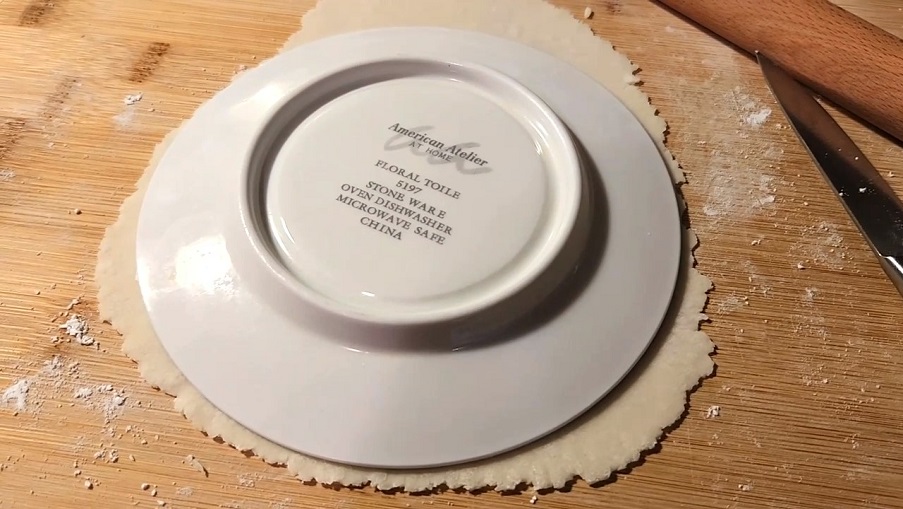
Rolling out the tortillos

It was more trickier than I imagined

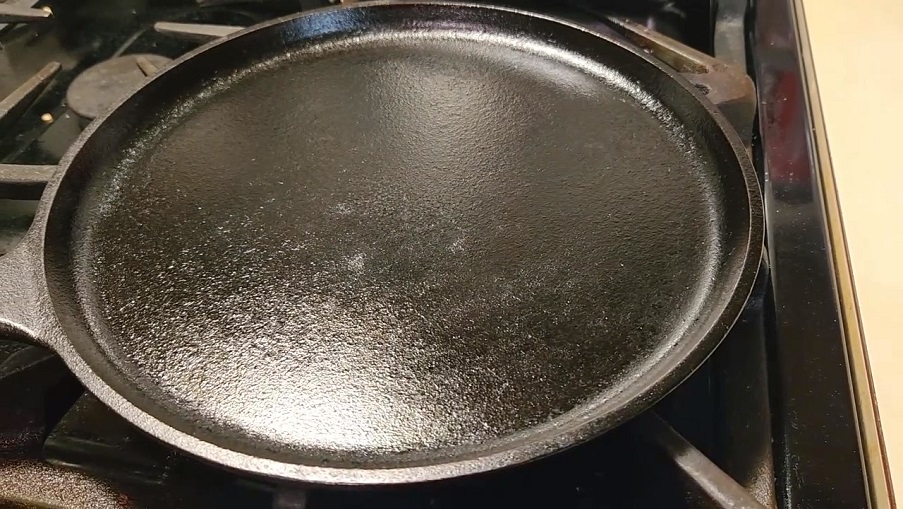
Waiting for the griddle to heat up.

When and when not to flip was the question?

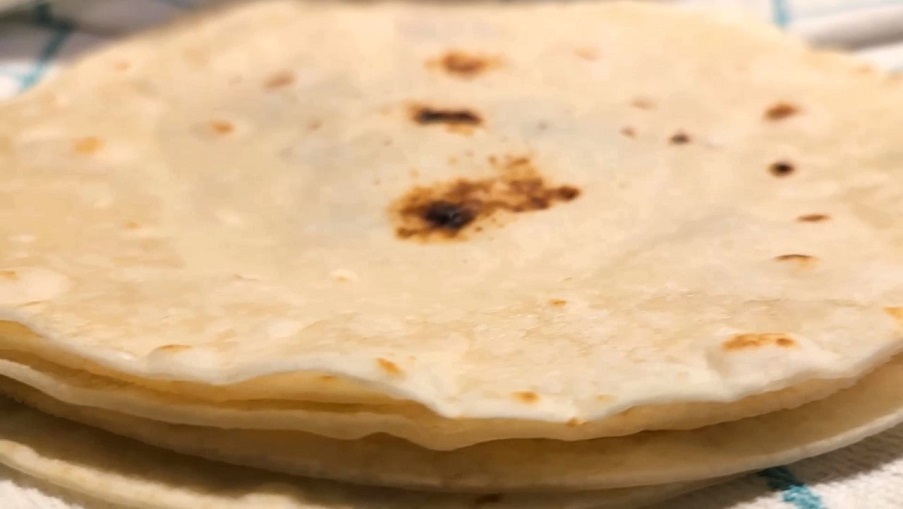
The griddle was too hot, so I almost burnt the tortillo!

Warming a flour tortillo

Breasfast scamble with sausage, eggs & cheese

A simple breakfast taco, mmm-mmm-good!

Press, Flatten, and Roll
Measure and Mark
Cut into Rounds
Place it on the Griddle until you see Bubbles

When you see Bubbles, Flip!

Remove, Let Cool, and Serve
Homemade tortillo are the best!

Scramble eggs, ham, red onions & mixed peppers

Fill'em and eat'em is what I do best!

Sauteed Veggies with Crabmeat

Soft Scrambled Eggs

A Seafood Breakfast Taco

Breakfast scramble

Homemade Brioche Buns

Breakfast Scramble + Bun = Sandwich

Choose your buns

Cook the homemade sausage

Scrambled the eggs

Toast the buns & cut the cheese

Assemble the Slider

Its time to eat!

Homemade Whole-grain Pancakes

Applewood Smoked Bacon

Almost ready to Toss & Flip

From This

Added a Little Something-something
To That in 10 Minutes!

Always prep the ingredients prior to cooking

A well seasoned wok is the key to "WOK HEI!"

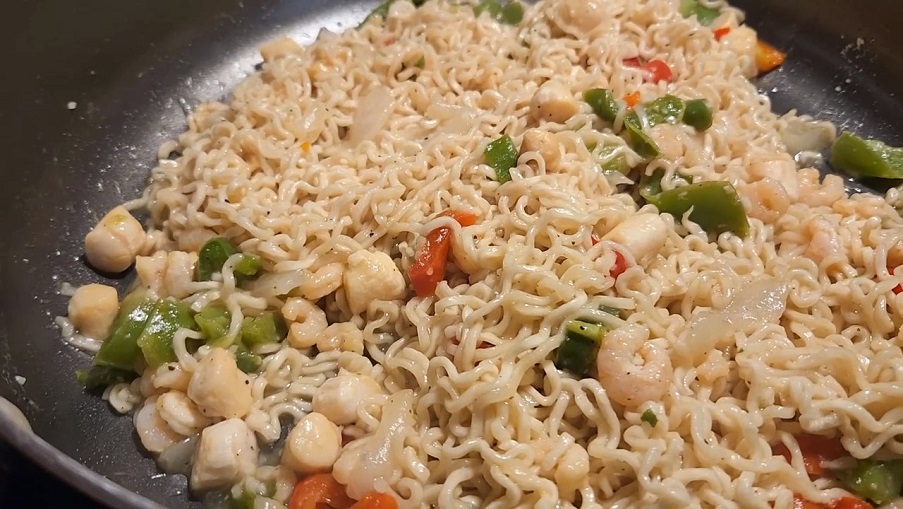
American fried rice with baby prawn

Cold rice sauteed with green onions

Reducing the soy sauce to a glaze

Pan fried riced, tossed until evenly coated

Marinated shrimp sauteed in scallion oil

Shrimp tossed in a Ginger-honey glaze

Ginger-honey shrimp served over pan fried rice

Mixed Peppers, Carrots, Red Onions, etc...

Putting Everything Together
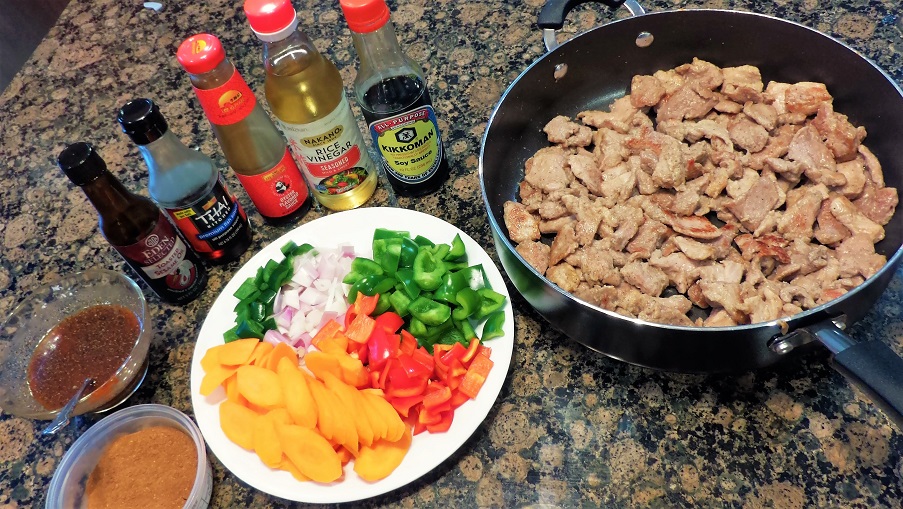
Stir Fried Pork in a Black Pepper Sauce

Simplicity within Complexity

Garlic Braised Mixed Veggies

Ginger-Honey Pork

Lets get started

Time to roll the eggroll

Eggrolls with Ginger-Honey Pork

Veggies, Crispy Pork, and Sauce
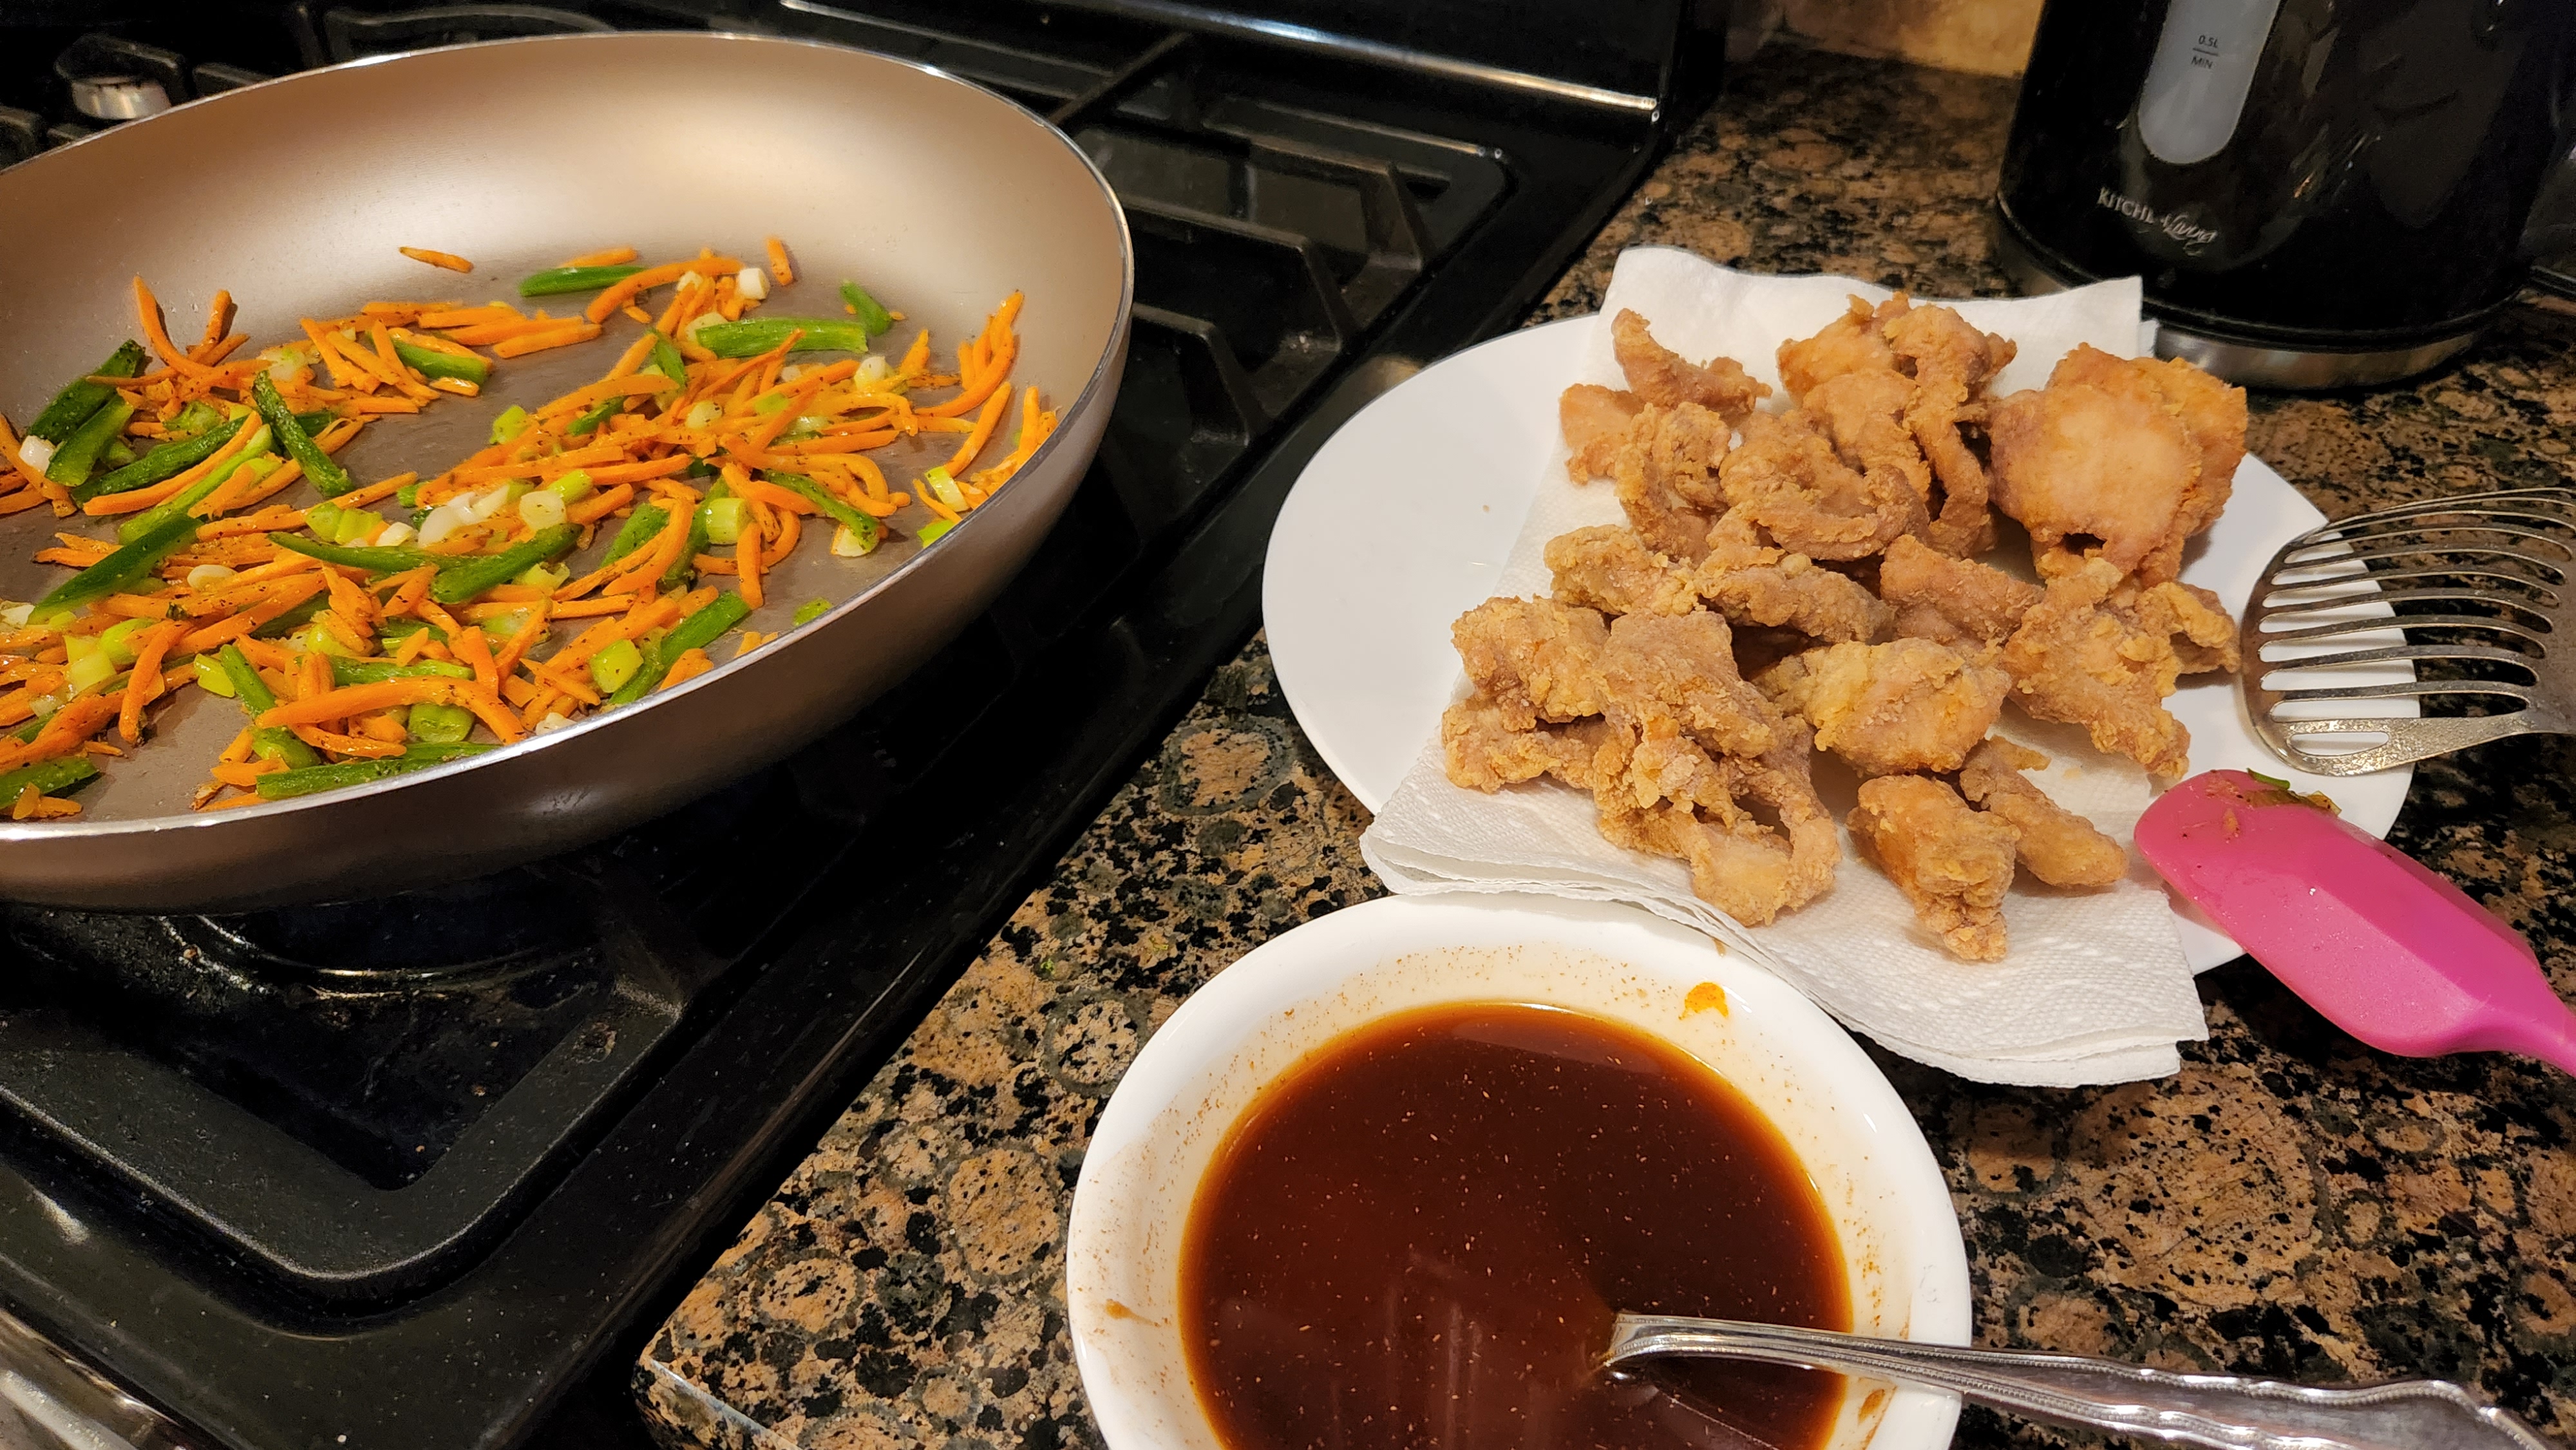
Add Sauce to veggies, cook until thickened.
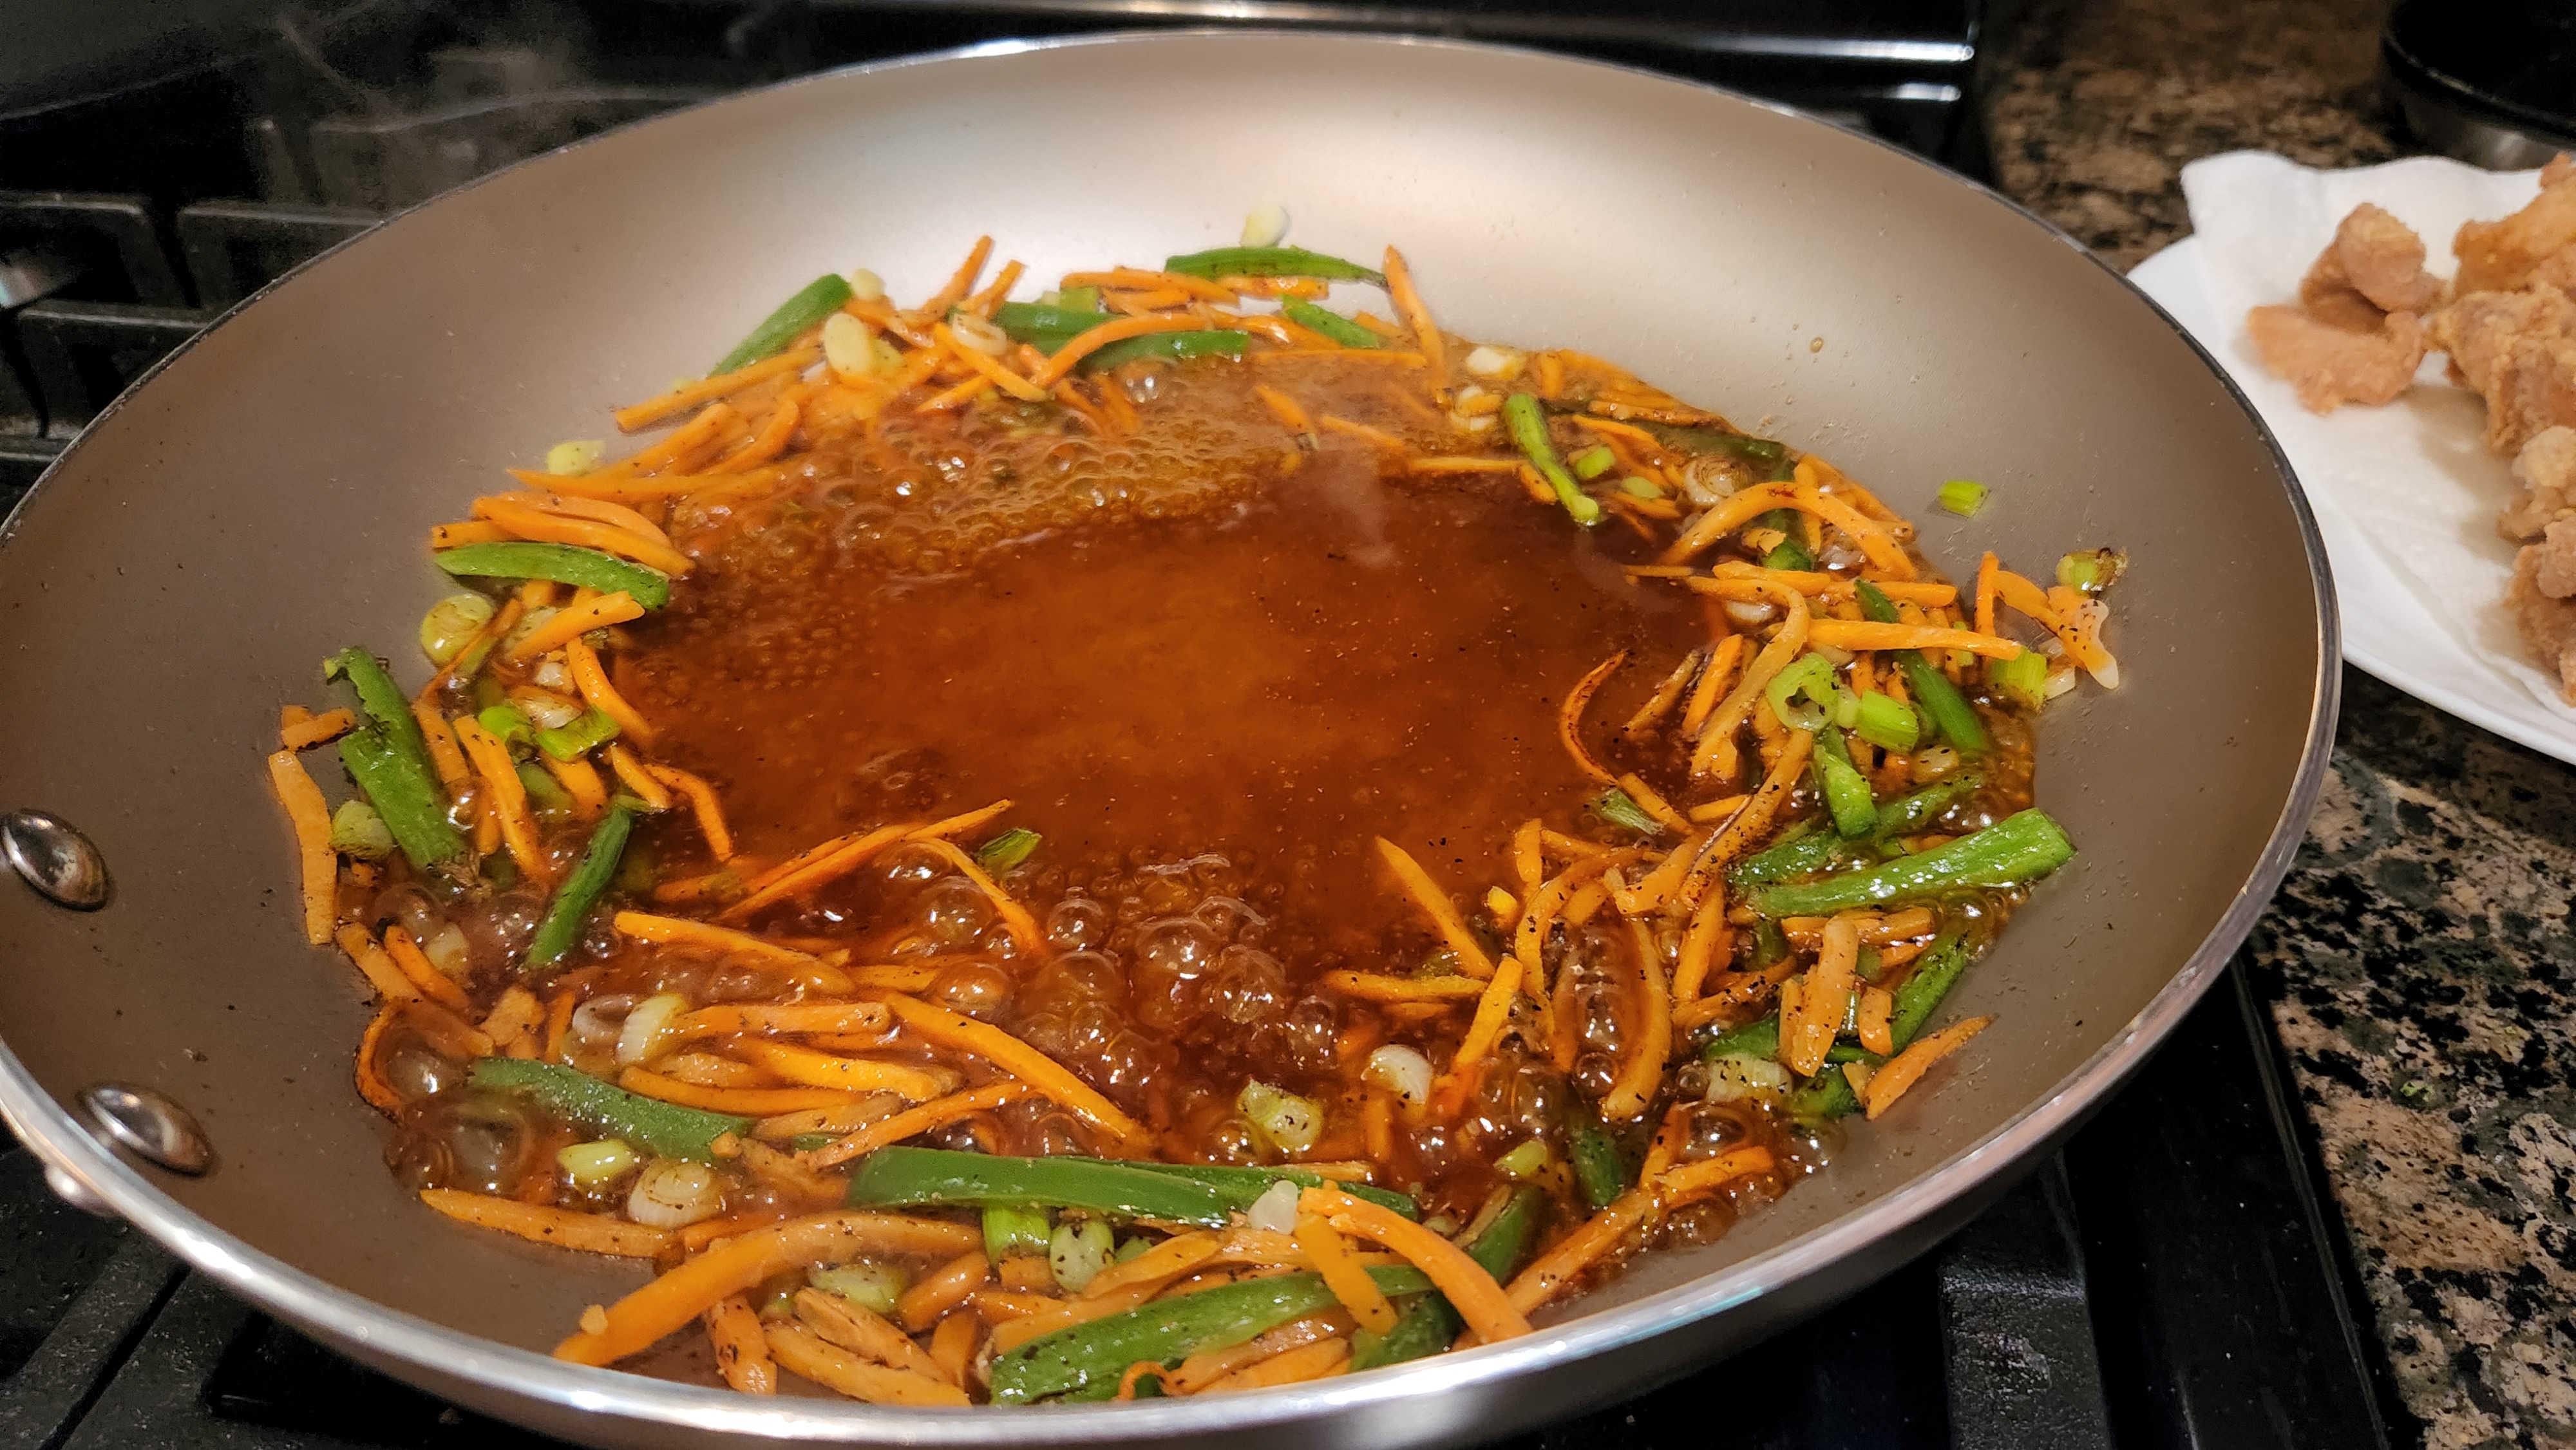
Scallion-Crispy Pork

Food prep is the key
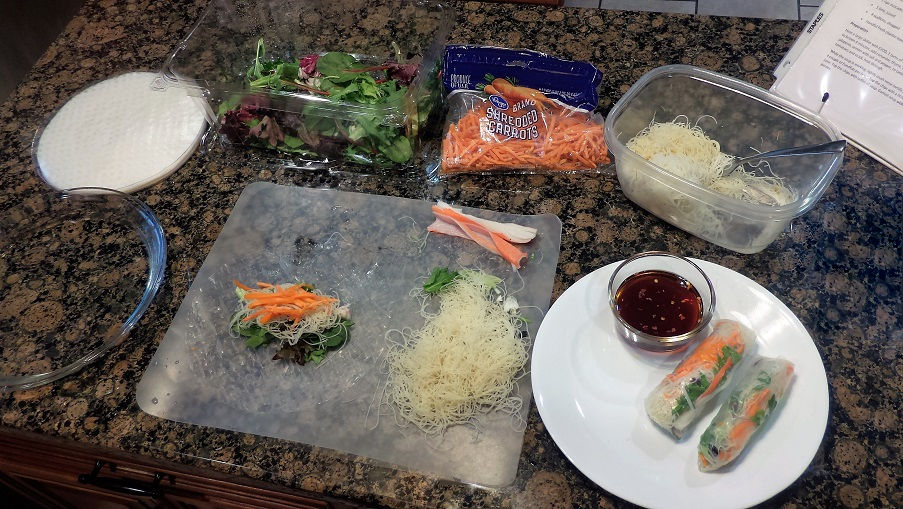
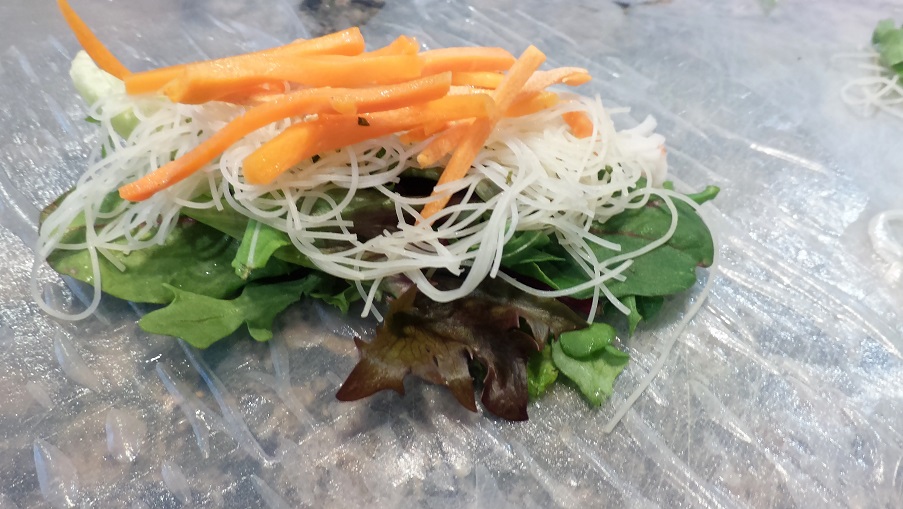
Fresh veggies, crab meat & glass noodles
A Savory-Sweet Dipping Sauce

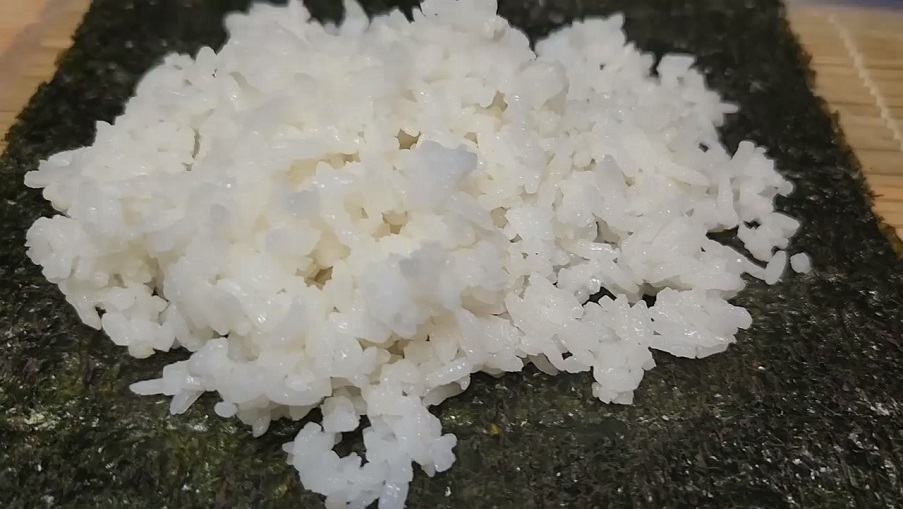
Sushi Rice A.K.A. "Sour rice"

Complexed Ingredients to make a Simple Dish

Smoked Trout, Sushi Rice, Nori and Wasabi

Where do I start?

Let's make a Georgia Roll

Not bad for my first time

This time, Maki Sushi

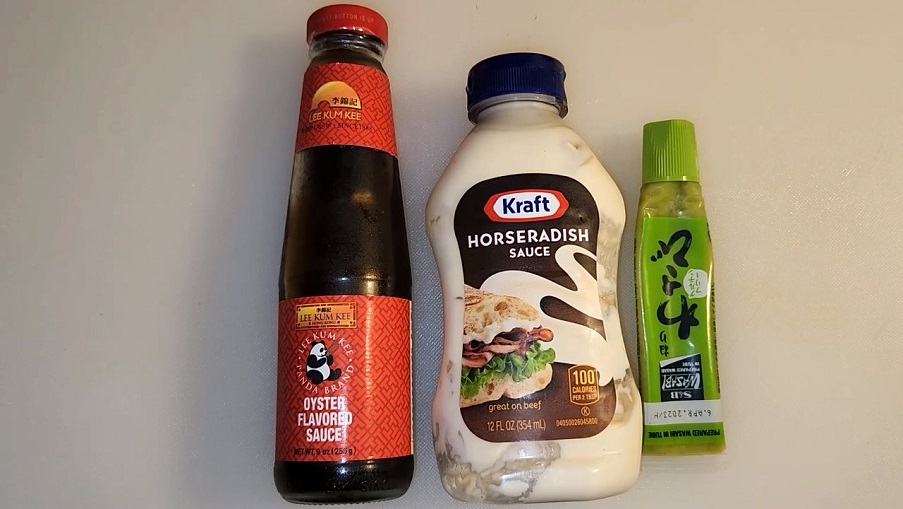
Crab Meat with a Horse Radish Cream Sauce

So Far, So Good!

A Sushi-yaki Roll, which is a twist on a California Roll

A Maki Roll, but Supersized

A Fat Maki Roll vs. a Maki or Uramaki Roll

Time to cook the rice
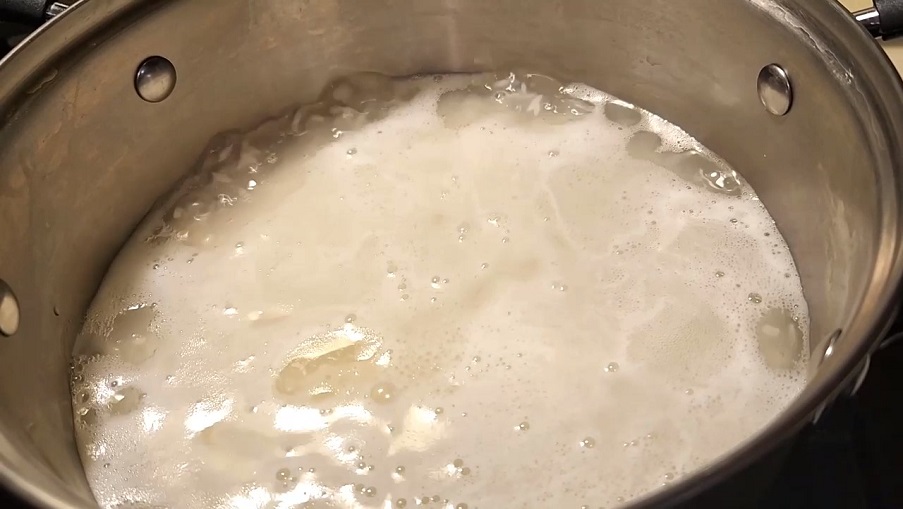
I use a blend of Sushi & Jasmine Rice

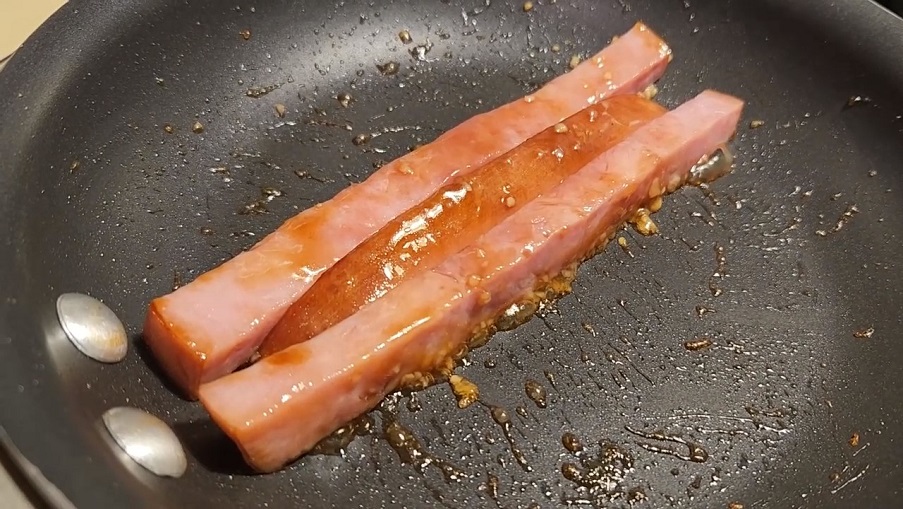
Sauteed ham glazed in oyster sauce
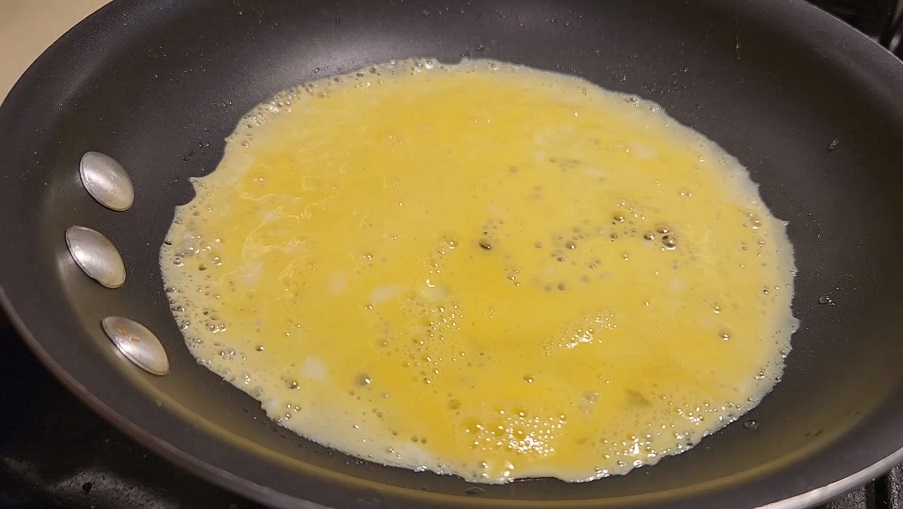
Making egg crepes
Choosing the right sauce
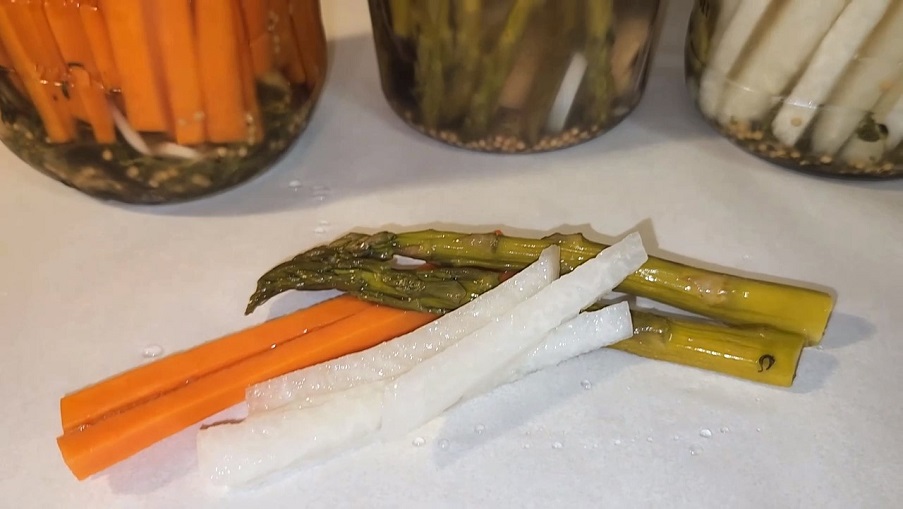
Pickled carrots, asparagus, and jicama
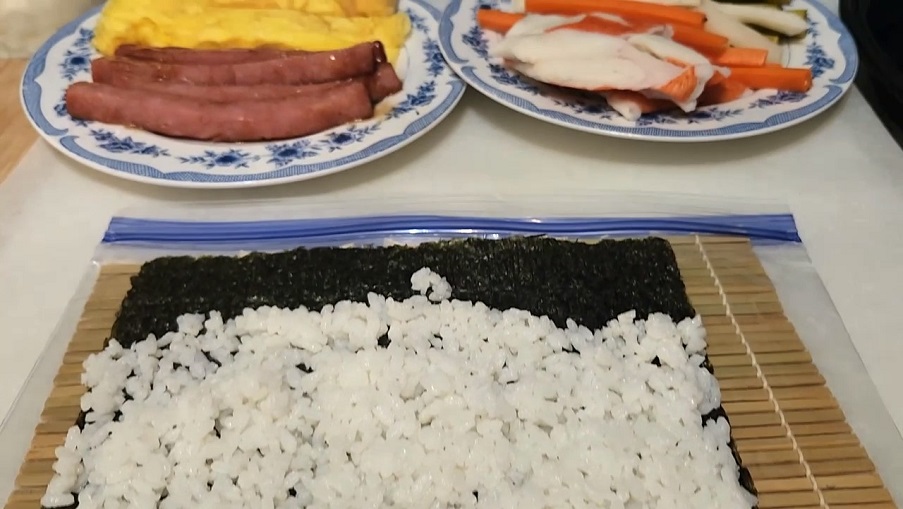
Adding seasoned rice to a sheet of nori
Ready to roll the gimbap

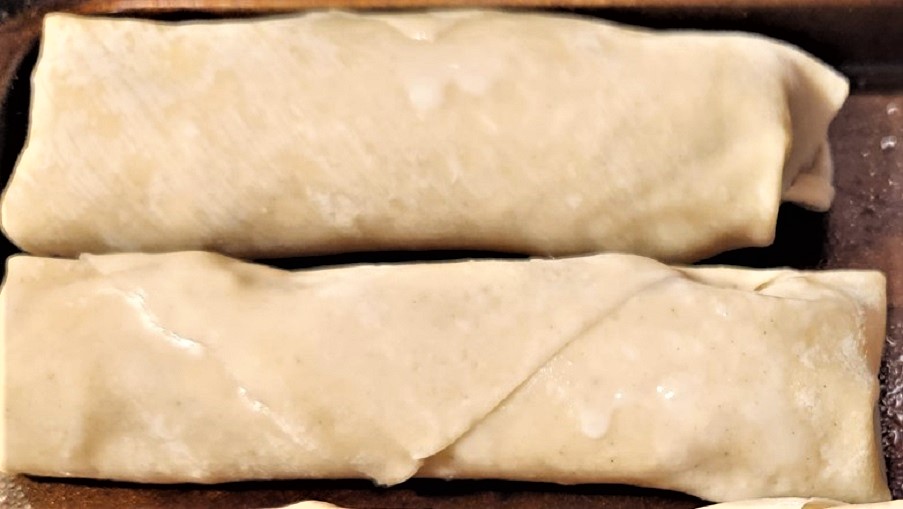
It is time to eat the gimbap!

Starting all over again, Gimbap anyone?

Lets get ready to gimmmmbap!
The raggedy end pieces belong to the chef

Cut veggies into medium to small chuncks

Blend using a food processor

Ferment, cook to sterilize, and serve

Rolling dumplings is hard!

Simple shapes are easier to make.

Fried, steamed, and seared.

Step 1: Add the filling and Wet the Edges.

Step 2: Fold, Roll, and Fry them!
Step 3: Eat them and Smile.

Flour, sugar, salt, and cubed butter

Blend the ingredients to make butter crumble

Add cold water to the crumble to form the dough

Roll dough to make the crust

Measure dough using a pie plate

Add dough to the pie plate and cut lattie strips

Peeling, coring, and slicing the apples

Adding pie filling to the crust

Once baked, allow to cool before eating

Making a lattice crust

Time to bake my cherry pie

Just shut up and eat

Crumble Crust Keylime Pie

Best served cold
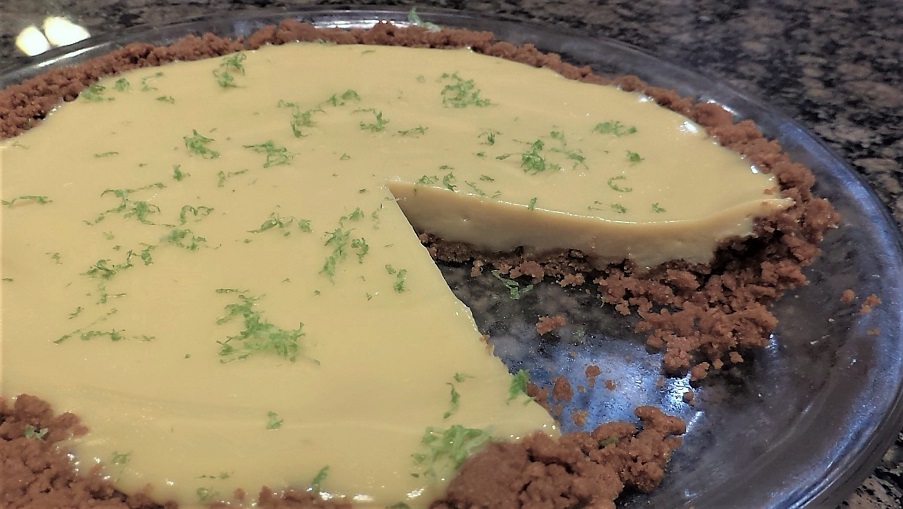
Eaten with whipped cream & lime zest

Extra fudgie

Both crispy and moist!

Eaten with vanilla ice cream


